These little bad boys have received critical acclaim.
Well, my husband declared them to be ‘amazing balls’ and my friend Jacqui can’t stop raving about them so that’s kind of the same thing.
And actually they’ve come along at exactly the right time of year. With Halloween and Christmas both fast approaching we are constantly bombarded by ads for sweet treats, the shops are chocca with choccy and waistlines across the lands are feeling the pressure.
I can’t tell a lie; these indulgent treats are not low fat. They are however, packed full of nutrients which will keep your energy levels high enough to endure the coming festivities! They’re also pretty rich so should help you feel satisfied without overdoing it.
The ‘Nutella’ flavour comes from hazelnuts and cocoa powder and those are the exact ingredients I’ve used here.
You’ll need:
Half a cup ground walnuts
Half a cup ground hazelnuts
1 tablespoon ground flaxseeds
1 tablespoon ground wheat germ
1 cup dried dates
1 tablespoon cocoa powder
3 -4 tablespoons hazelnut milk
1 tablespoon maple syrup
Dessicated coconut for rolling
In a bowl mix the nuts, wheat germ, seeds and cocoa powder. Spoon the mix into your food processor and pulse with the dates, milk and syrup. If the mixture is too wet add some more ground nuts or wheat germ, too dry and you can add a little more milk. You want it to be moist enough to roll easily into little balls. Take the balls and coat them in coconut and then leave them in the fridge for an hour or two to set.
Now for the really fun part. Mix it up! There are a whole host of other ingredients and flavour combinations you could try.
How about chocolate orange, mint choc chip or rum and raisin? Or even just plain old vanilla?
(Not sure what this has to do with veganism? Cick here.)
Mooching about raw food forums has introduced me to a vast array of people who take ‘purity’ to a whole new level. Not content with paring down what they put in their bodies for optimal health, many are equally concerned with what they put on their bodies.
Of course when you consider that the skin is the largest of the body’s organs, there is a lot of sense in limiting the chemicals to which we subject our skin.
Washing hair with baking soda and apple cider vinegar is one topic which keeps catching my eye.
I have problem hair. I’ve dyed it repeatedly over the last 10-15 years, I’ve used heated straighteners or curling irons almost daily. To combat the damage from the heat and chemicals I smother my poor abused straw with even more chemicals in the form of deep conditioning treatments. It’s a never-ending cycle of abuse.
I’ve read countless stories of people in similar situations who have reaped wonderful benefits from ditching commercial (and chemical laden) shampoos and conditioners in favour of home made solutions. After an initial period of readjustment hair is apparently softer, shinier and more manageable.
Well, I want me some of that!
Vanity aside though, this appeals to me for a number of reasons.
Happily I’ve found vegan friendly shampoos and conditioners (no animal derived ingredients and not tested on animals) on the high street but of course every time we buy something in a plastic bottle, something that has been produced in a factory and that has been transported x number of miles in the back of a truck, we contribute to environmental damage. So if there’s a way to avoid that without turning into Worzel Gummidge, I’m all for giving it a try. Hey, I’ll also save a few quid. Happy days.
So, here’s a recipe unlike my usual offerings.
Take a clean shampoo bottle and fill it with 1 tablespoon of baking soda mixed with 8oz of water. Mix well each time you use.
Take another clean shampoo bottle and fill with 1 tablespoon of apple cider vinegar and 8oz of water. Mix well.
The baking soda is your shampoo, the vinegar your conditioner.
Both need only be applied to your roots and scalp, rubbed in and then rinsed thoroughly as you would commercial hair cleaning products.
My experiment:
Today I have tried this for the first time.
I skipped the baking soda step as my hair was washed with commercial shampoo just yesterday and is prone to dryness.
I admit that I miss the lather of my shampoo and the fruity smell of my usual conditioner. My hair is still damp as I type this but my roots feel very soft and not at all greasy so far. The ends feel like they might be drier than usual and if that does turn out to be the case I’ll consider adding a little coconut oil to the ends to provide a little conditioning treatment.
I’ll report back in a few weeks with the results of my experiment. In the meantime, if someone wants to send me a hat, I won’t argue!
And for those of you who are wondering who on earth Worzel Gummidge is, have a look at this.
The Result.
Unfortunately I have returned to the dark side. I’m back on the ‘poo.
Initially the experiment was a roaring success. I won’t lie, I certainly missed the smell of commercial hair products but other than the lack of artificial fragrance, I was pleased with the results.
I didn’t look like our friend Worzel there, I didn’t even need a hat. I completely escaped the expected greasy first few weeks. My hair was soft and slightly more shiny (at least I think so. I mean, how can you accurately measure something as unquantifiable as hair shine?!) I didn’t smell like a chip shop from all the vinegar conditioner. Or I did and I really need to find some less tactful friends.
If it hadn’t been for the flake issue I would have kept it up indefinitely. A few weeks in though and my scalp became increasingly itchy so alas, I returned to my anti dandruff shampoo (Superdrug’s take on Head and Shoulders. It’s labelled as vegan) and within a couple of washes the itchiness had cleared.
I’ve now been sucked back into the non eco but beautifully smelling world of commercial shampoos and conditioners again. Naughty girl.
Perhaps the answer lies in alternating the anti dandruff shampoo with the natural hair washing methods to see if that solves the problem. Unless anyone has found natural ways to beat the itch?
Initially I was unsure about whether to post this recipe. After all, I don’t want to perpetuate the stereotype of a vegan who eats nothing but hummus and lentils,never mind combining these two vegan staples. Next I’ll be posting nothing but tofu and salads!
Yes, the poor old lentil gets short shrift sometimes from vegans as we strive to prove that there’s so much more to a vegan diet than lentil loaf. No more though. I am happy to declare from the rooftops my love of the humble lentil. Versatile, nutritious and ever so handy for those days when the cupboards are pretty bare you can’t be bothered going to the supermarket, they are veritable shape shifters. Yesterday they made a delightful daal, tomorrow they might disguise themselves in burger form, introduce them to some spinach and passata and you have the makings of a rather gorgeous vegan lasagne…
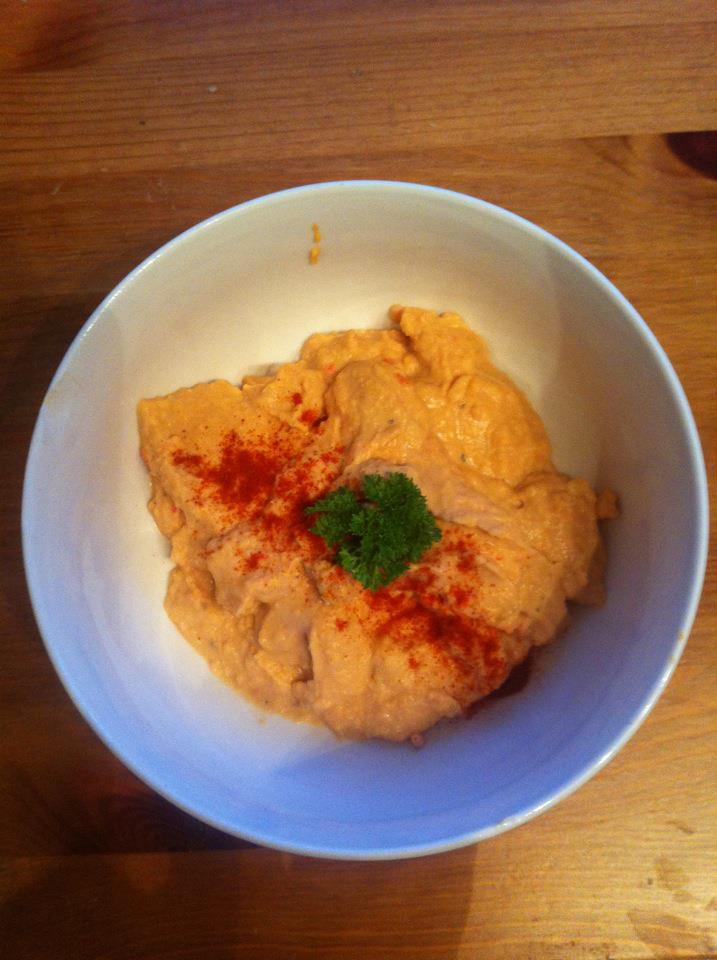
Today though, my little lentil friends are feeling all Middle Eastern.
So, here we go. Get your blender out and chuck in the following ingredients:
1 cup of cooked red lentils
1 tablespoon tahini
2 tablespoons olive oil
1 chopped, raw red pepper (you could try a marinated, roasted pepper instead if you like)
My blender is not that great so I have to add a little water to get the ball rolling.
So that’s the hummus base taken care of but it still lacks a little sparkle. Add the following ingredients gradually to work out your own preference. If you like the tart freshness of lemon juice, try adding a tablespoon. If that’s too much for you, tone it down a little.
lemon juice
salt and pepper
garlic granules (you could of course use fresh garlic cloves but I find this is too ‘spicy’ for the kids’ taste, granules over a more subtle flavour. Next time I will experiment with roasted garlic)
smoked paprika
Give it all another whizz in the blender, decant into a bowl, sprinkle with smoked paprika and garnish with fresh parsley.
You could serve this traditionally with pita bread or use it as a sandwich filling but I found that my boys quite liked it as a pasta sauce. Simply add a dash of olive oil to thin it out a little and stir it through some cooked pasta. For extra nutrients and flavour, add some sun-dried tomatoes, mushrooms and more fresh parsley.
Anyone who has tried some of my cake recipes in the past will have twigged that being vegan doesn’t automatically equal good health.
My personal battle is a reliance on refined flour and sugar – I’m a borderline addict!
Cue a health kick.
Still, just because I’m being all healthy doesn’t mean I want to forgo the odd treat.
Thanks to my friend and master baker Jess Crisp (check out her amazing cupcakes here), I don’t have to. She has kindly allowed me to reproduce her recipe for raw chocolate brownies.
You will need:
1 cup of mixed nuts (I used cashews, walnuts, brazils and almonds)
1 cup of dried fruit (I used mainly sultanas with some apricots and dates thrown in for good measure)
2 tablespoons cocoa powder
1 tablespoon agave syrup
1-2 tablespoons almond milk
In your food processor pulse the nuts until they are nice and crumbly then add the cocoa powder and pulse again to ensure the nut mixture is well coated. Add the fruit and pulse once more. Turn the mixture out into a bowl and stir in the agave and almond milk until you have a stodgy texture.
Press the mixture into a container and pop in the freezer to cool.
Palm oil is the hot topic in vegan circles at the moment.
Why might it not be vegan?
Technically it is a vegan ingredient and it is a prominent feature in so many vegan products, from margarine to dairy free ice cream. It is entirely plant based.
However, any ethical vegan will tell you that the whole goal of veganism is to avoid animal exploitation and abuse. And I don’t think anyone could argue that palm oil is innocent when it comes to those charges.
Palm oil production is responsible for deforestation on a massive scale. In Borneo and Sumatra, Orang-utans are losing their habitat at an alarming rate. With nowhere left to go, they are forced into local villages to find food for their children. Mothers are killed, tortured, burnt alive and even used for prostitution (yes, really). Their babies are prized away from their still warm bodies become victims of the exotic animal trade. It is predicted that within 10 years these ‘men of the forest’, these animals who are so like us, who share around 97% of our DNA, will be extinct.
Surely no ethical vegan could be ok with this? Surely no person with an ounce of compassion in their body could be ok with this?
It’s everywhere!
Often labelled simply as vegetable oil, it’s hard to know when you might be buying palm oil.
So what is the answer?
A boycott of products containing palm oil (yes, even those marked vegan) is one option. I’m in two minds over how useful this will actually prove; vegans are such a small minority, those who care about palm oil even more so.
By all means boycott these products. I’m heading that way – trying to gradually reduce the palm oil we eat as a family. Fussy kids and a tight budget make it harder than it might be if I was living alone and catering only for me.
A far more useful activity, I believe, is to take a few minutes out of your day and email or write to companies who use palm oil in their vegan products. Highlight your concern and ask them to reconsider their use of this highly unethical ingredient.
UK high street store Lush have already stopped using palm oil in their products so it can be done.
Swedish Glace and other commercial brands of vegan ice cream can be pretty good but as you know, I do like to make my own versions of things!
Here’s my recipe for a super simple vegan ice cream. This has the added bonus of being soya free.
For the first attempt, I didn’t get too adventurous but I imagine you could add all sorts of yummy goodies to give you a new flavour for every day of the week although be wary of adding too much liquid as this could hamper the freezing process. Chocolate chips, mashed blueberries, a little lemon juice, chopped nuts…let me know if you try any variations of your own.
1 400ml can full fat coconut milk
3 tablespoons icing sugar (I have a major sweet tooth so you could probably put in less sugar than I did!)
1 teaspoon vanilla extract
Put all ingredients into a blender and whiz it up. Pour the mixture into a freezer friendly tub and freeze for about 5 hours. Stir occasionally.
I found that after 5 hours it was perfect. Mostly frozen but still very creamy. Frozen for any longer and the texture changed and became very hard and difficult to serve (although it was still very creamy when eaten). I think next time I’ll put the ice cream back into the blender before serving to soften it up a bit.
My next experiment may well be a mint choc chip ice cream; that was always my favourite flavour and I’d love to find a great vegan version, whether from a store or whipped up in my own kitchen.
I’ve heard many adjectives used to describe my baking efforts: ‘delicious’, ‘moist’, ‘scrumptious’, ‘disastrous’…but ‘sexy’ wasn’t a word I would have expected to hear in reference to a cupcake. Yet this is how my raspberry and chocolate chip cupcakes were described last weekend by my friend from the great Glasgow band The Meatmen. (Let’s take a moment to appreciate the irony of one of my favourite bands being called The Meatmen. Don’t let the name put you off, fellow vegans, they’re awesome. Check them out here: http://www.myspace.com/themeatmenglasgow)
So, on with the show.
For the cake:
1/2 cup vegan margarine/non dairy butter
1 cup sugar
3 cups self-raising flour
1 tablespoon apple sauce
1 cup non dairy milk (I used soya)
100g chocolate chips
Small pack raspberries
1 teaspoon vanilla extract
For the icing:
1 cup (approx) non dairy butter
Icing sugar
1 teaspoon vanilla extract
Preheat your oven to 180c and grease a cake tin or line a cupcake tray.
Melt the butter and mix with the sugar. In a large bowl mix the flour, apple sauce, milk, vanilla extract, chocolate chips and raspberries (you can add the rasps whole or break them up a bit – I did the latter). Add the butter and sugar mixture and stir until combined but take it easy with the mix and don’t over-stir.
Pour into your cupcake cases or cake tin. If you’re making a large cake, bake it for about 45 minutes, cupcakes should be ready in about 15 – 20 minutes depending on your oven.
In a separate bowl cream the butter and vanilla extract and add icing sugar gradually until you end up with a thick butter cream. Spread or pipe the icing onto your cake(s) and decorate with fresh raspberries or chocolate chips (or both!).
I’ve gotten into a bit of a food rut recently; I tend to rotate the same few dishes each week. Without fail, I throw sweet potatoes into my trolley during the weekly supermarket trip but usually stick to making soup or curry with them so I fancied trying something different. My mum made me a delicious root vegetable tagine a few weeks ago so this was my attempt to recreate it.
For the tagine:
1 onion, finely chopped
3 sweet potatoes
1 cloves of crushed garlic
1/2 butternut squash
3 carrots
2 tablespoons tomato paste
1 tablespoon lemon juice
1 1/2 teaspoons cinnamon
1 1/2 teaspoons ground ginger
1 teaspoon cumin seeds
1 cup dried fruit
Dice the root veggies. Fry the onion in a little oil until softened, then add the cinnamon, ginger and cumin seeds and the crushed garlic. Cook gently for 5 minutes and then add the root veg. Stir in the tomato paste and lemon juice and then add some water. I didn’t measure the water but I would estimate that I put in around 300ml. You could use more or less depending on how ‘saucy’ you’d like the dish to be. (I actually put in a little too much water but just scooped some of the gravy out towards the end and used it to flavour the cous cous!) Throw in your dried fruit. I used apricots and dates but my mum’s version contained prunes; all work well with this dish so just use whatever you have kicking around your cupboards. Allow to simmer for around 30 minutes or until the vegetables are cooked all the way through.
For the cous cous:
Use 200g cous cous to serve 4.
Place the cous cous in a saucepan with a tablespoon lemon infused olive oil and a dash of cinnamon. Add 250ml of vegetable stock and bring to the boil. Once it has started to boil, remove the pan from the heat and allow the cous cous to absorb the water.
Fluff it up with a fork before serving,throw in a handful of raisins and mix. Serve with the tagine.
I’m pretty much of the opinion that all chocolate cake is good chocolate cake – as long as it is cruelty free of course. It turns out, however, that all cakes are not created equal; I’m going to blow my own trumpet here and declare that I, Mrs Babystepsvegan, have created the Grandaddy of chocolate cakes!
But don’t take my word for it, try it for yourself.
For the (single) sponge:
4oz of non dairy butter
1 cup brown sugar
1 cup soya milk
2 and 2/3 cup self raising flour
1/3 cup cocoa powder
1 dessert spoon apple sauce
For the icing:
morello cherry jam
non dairy butter
icing sugar
vanilla extract
cocoa powder
NB: when it comes to icing, I NEVER measure the ingredients, partly because I’m lazy, partly because I like to have an excuse to dip a finger in the bowl for ‘testing’ purposes. Hmm, needs more sugar…
Method:
Preheat the oven to 180c.
Melt the butter in a saucepan and stir in the sugar. Keep the heat low as you really don’t want to risk burning the butter.
Mix the flour and cocoa powder in a large bowl. Stir in the soya milk (or other plant milk) and apple sauce. Add the melted butter/sugar mix and stir gently but thoroughly – do not beat. Pour the cake mixture into a greased cake tin and bake for about 40 minutes.
Now, you could leave it at that, but I was making this for a special occasion – my son’s birthday – so I thought that we could justify a second layer. I baked a second sponge using the method above.
After leaving the cakes to cool, I spread a very generous helping of cherry jam on top of the first sponge. I then added some vanilla icing (made by beating some ‘butter’ and adding icing sugar and a touch of vanilla extract until I had a nice thick texture which was easily spread on top of the jam.) Gently place the second sponge on top to make a ‘sandwich’ and using a palette knife coat the cake with a nice thick layer of chocolate frosting (made in the same way as the vanilla icing but replacing the vanilla extract for cocoa powder – the more cocoa powder you add the richer the chocolate flavour will be).
I covered the cake in vegan chocolate beans (at my son’s request) but I think it would be even better covered in fresh black cherry halves.
If you’re being ‘virtuous’ (and that’s a very loose interpretation of the word!) and having a single layer cake, simply spread the jam over the top of the sponge and then cover with chocolate icing.
I’m tempted to try replacing the vanilla icing for a layer of vanilla ice cream next time. In fact, now that I’ve suggested it, I feel it is my duty to conduct just such an experiment. I’ll let you all know how it turns out!!
I’m really happy with this recipe. Mostly because I kind of made it up on the spot and it turned out to be amazingly good. Which was a relief because I was catering for family visiting for my little vegan’s 4th birthday party!
Honestly, the chutney was so good I could have happily eaten it on its own straight out of the pan (ok, you got me, I actually did have a few sneaky spoonfuls) but if you are slightly more refined than I am, I have a few suggestions of how to use it:
Cheese and onion rolls:
Roll out some Jus Rol puff pastry (or other vegan puff pastry) and cut into about 9 squares. Add a dollop of chutney to each square and add a piece of vegan cheese. Fold each square over to form a triangle and then bake in the oven for about half an hour or until the pastry is fully ‘puffed’ and golden and smelling so good that you just have to have some now. These are great additions to a buffet (I discovered!) or make a lovely starter when served with a little side salad.
Sausage-less rolls:
Again roll out some puff pastry and cut into squares. Place a spoonful of chutney onto each square and add a vegan sausage. You could use Linda McCartney’s mini sausages but I made my own sausages using a packet of meat free Chargrill burger mix from Asda. Follow the instructions on the packet but form mini sausage shapes instead of burgers. Fry the sausages for a few minutes to brown each side and then add them to the pastry squares. Roll up and bake for 30 minutes.
Bruschetta:
Toast some ciabatta slices, drizzle with a little olive oil, and top with chutney and a few rocket leaves.
Now finally, the chutney recipe:
3 onions, thinly sliced
1 teaspoon brown sugar
2 dessert spoons vegan redcurrant jelly
1 dessert spoon olive oil
Fry the onions gently in a saucepan with the olive oil. Add the sugar once the onions have softened and cook for another couple of minutes. Spoon in the redcurrant jelly and stir until the jelly has melted. Cook on a low heat for about 30 minutes or until you have a nice sticky mixture. Be sure to check the pan frequently and stir occasionally. I’d love to tell you how long this would last if kept in the fridge but trust me, this is not a question you will need to ask – it’s so good it won’t even make it to the fridge!